
Getting your navigation right is a fundamental piece of your affiliate site. In this guide, we will run through on how to set up your site navigation.
Table of Contents
Launch the Site Editor
You can load the Site Editor from the Front End of your Site or from your WordPress Dashboard, we will cover both here.
Launch Site Editor from the Front End
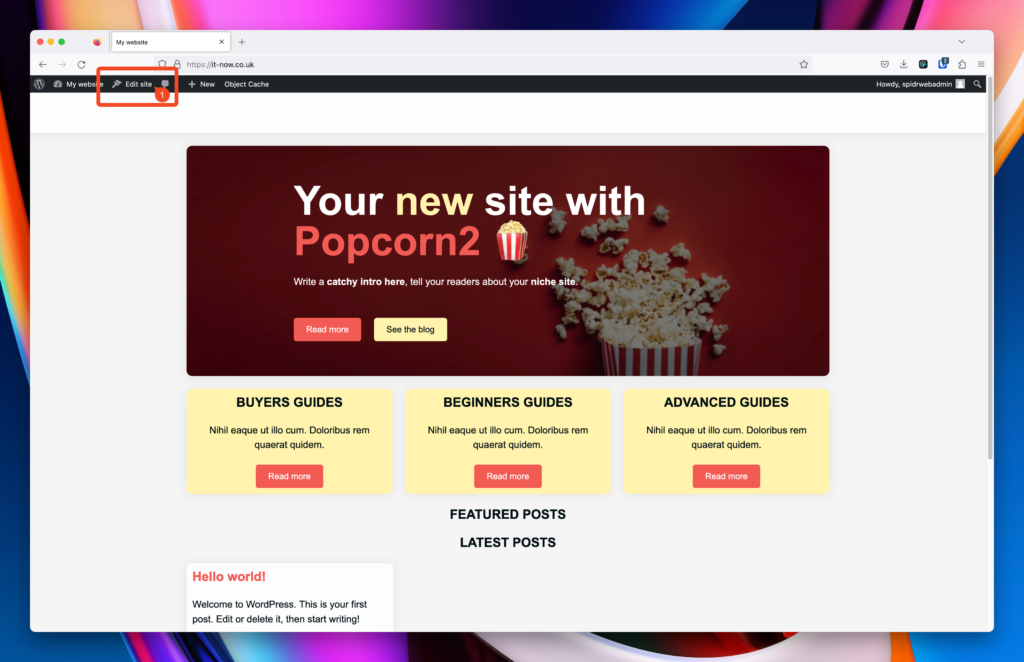
From the front end of your site you should see the WordPress Admin Bar. Click Edit Site (1).
Launch Site Editor from the WordPress Dashboard
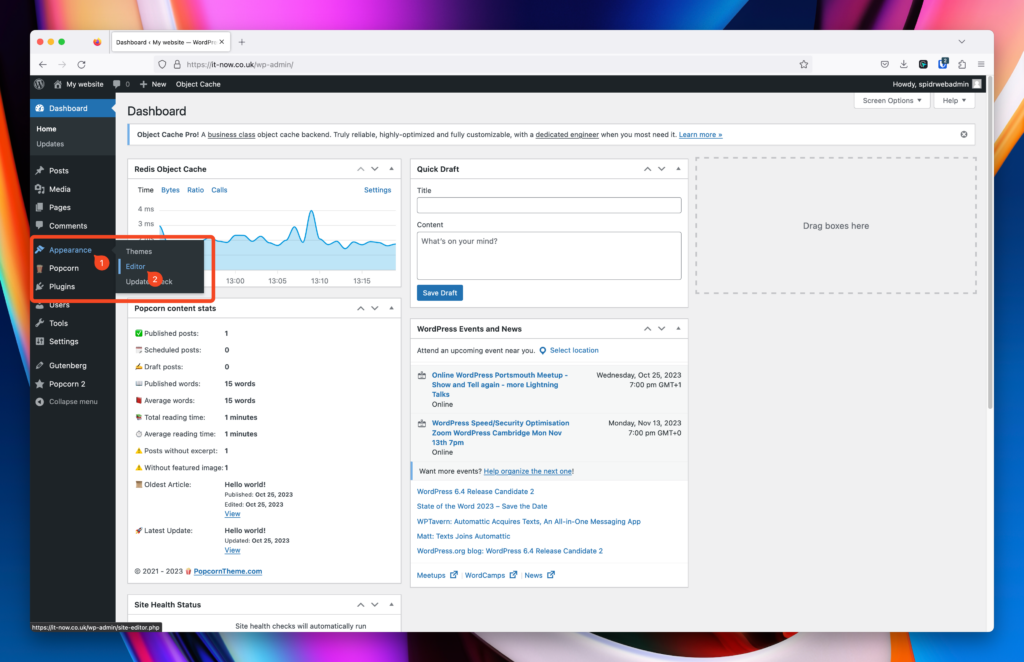
From the WordPress dashboard of your site click Appearance (1) > Editor (2).
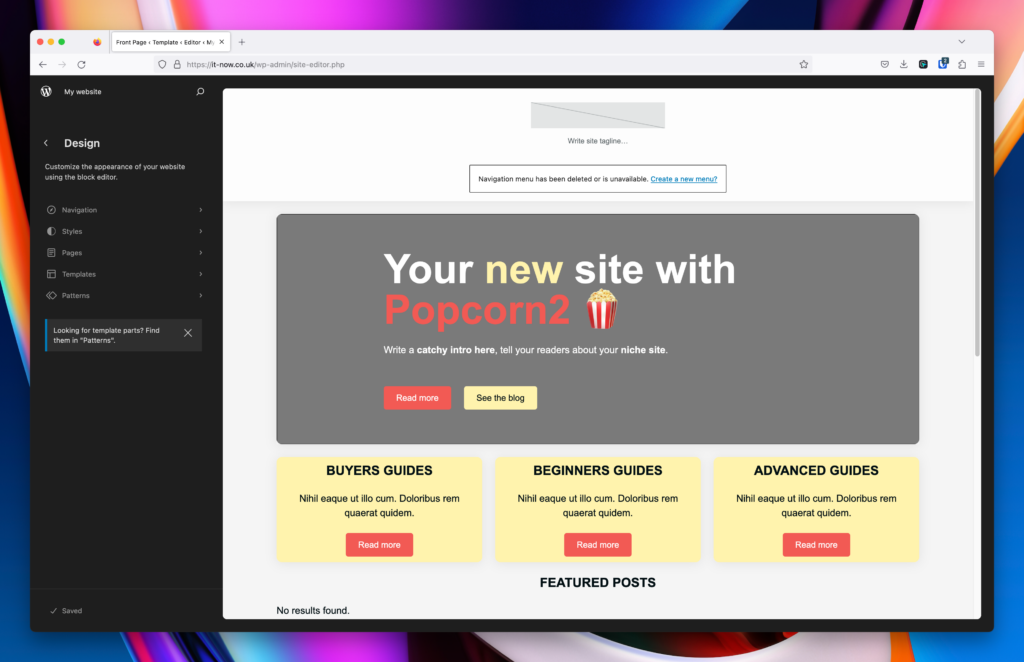
The Site Editor should now be open and look like this:
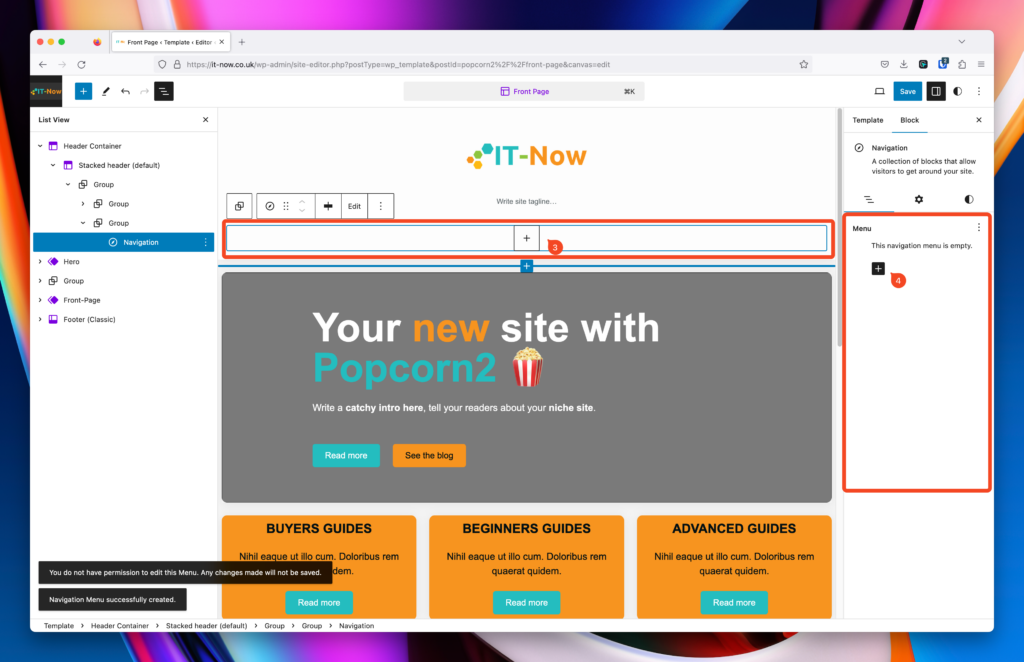
Creating/Editing Navigation Menu
Once you’re in Site Editor, you’ll be able to create a new navigation menu.
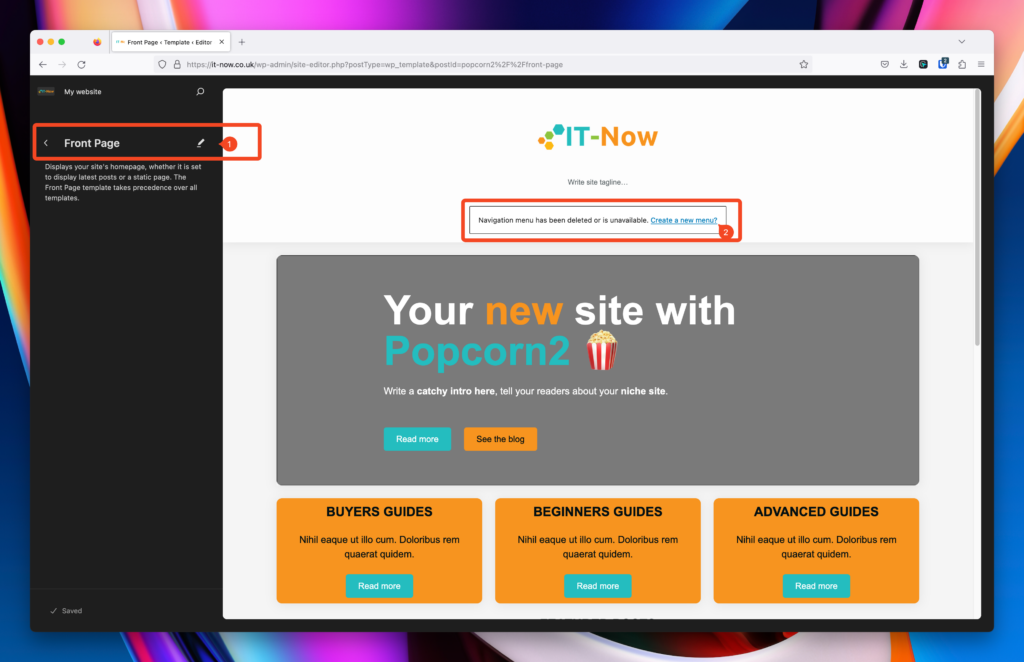
Open a template and click the pen 🖊️ icon (1). Now click Create a new menu (2).
You can either add menu items within the editor (3), or etit within the tool bar for the navigation block (4).
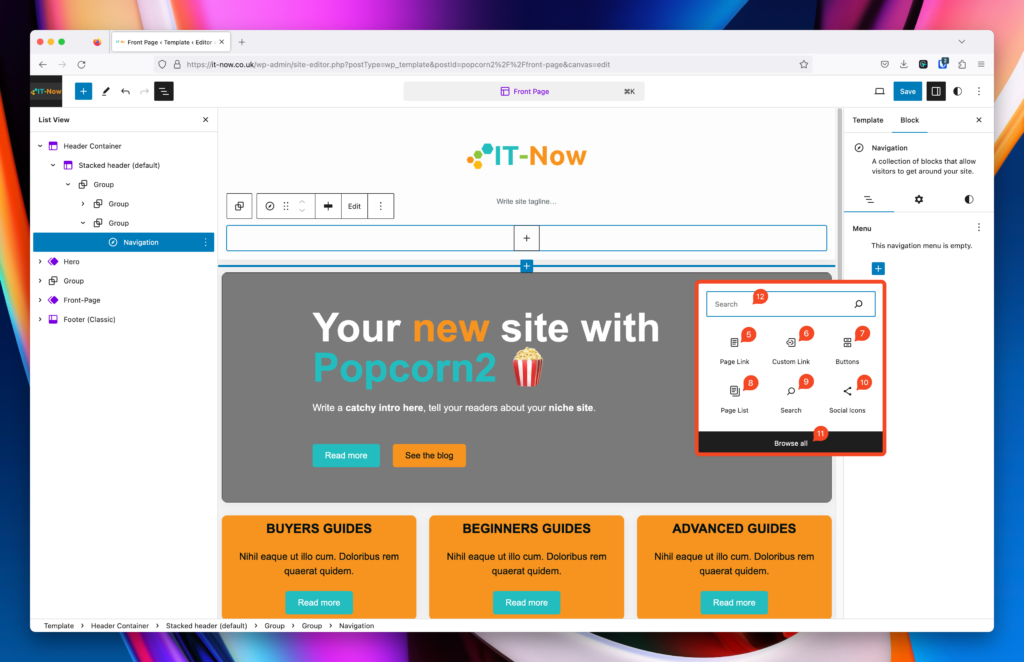
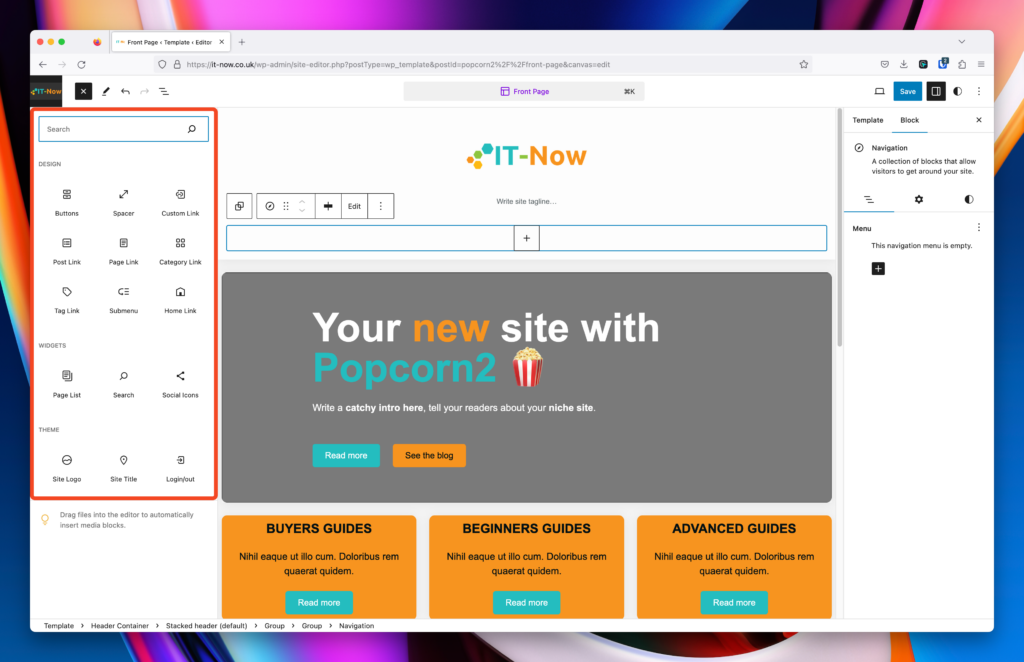
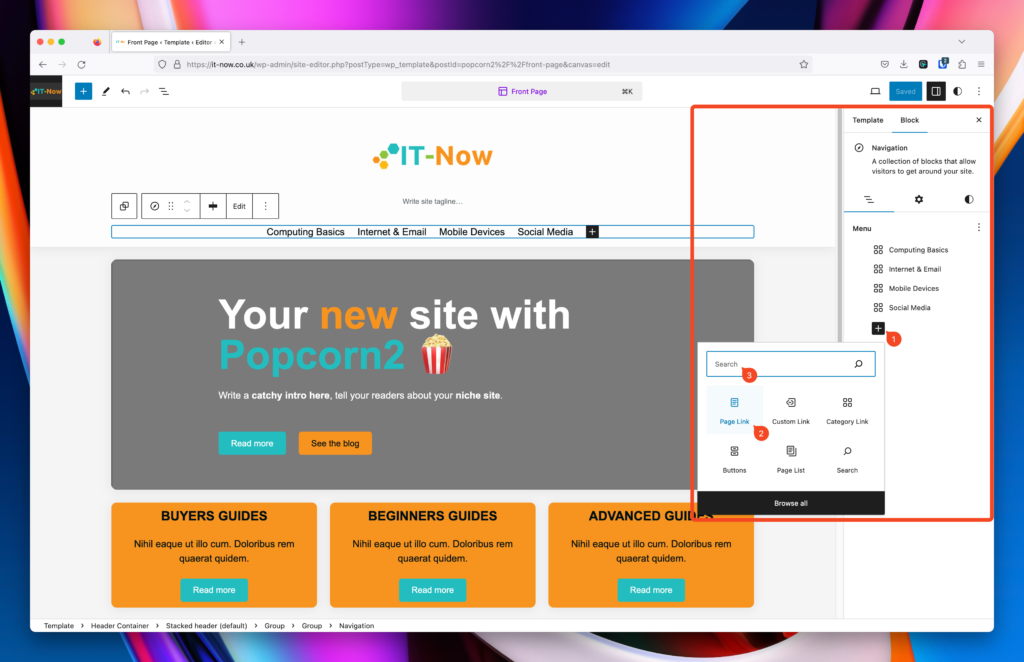
You can add the following types of links in the Navigation block:
- Page Link
- Custom Link
- Buttons
- Page List (Default)
- Search Block
- Social Icons
- Browse all to see all types that also include:
- Or Search for a Nav Item
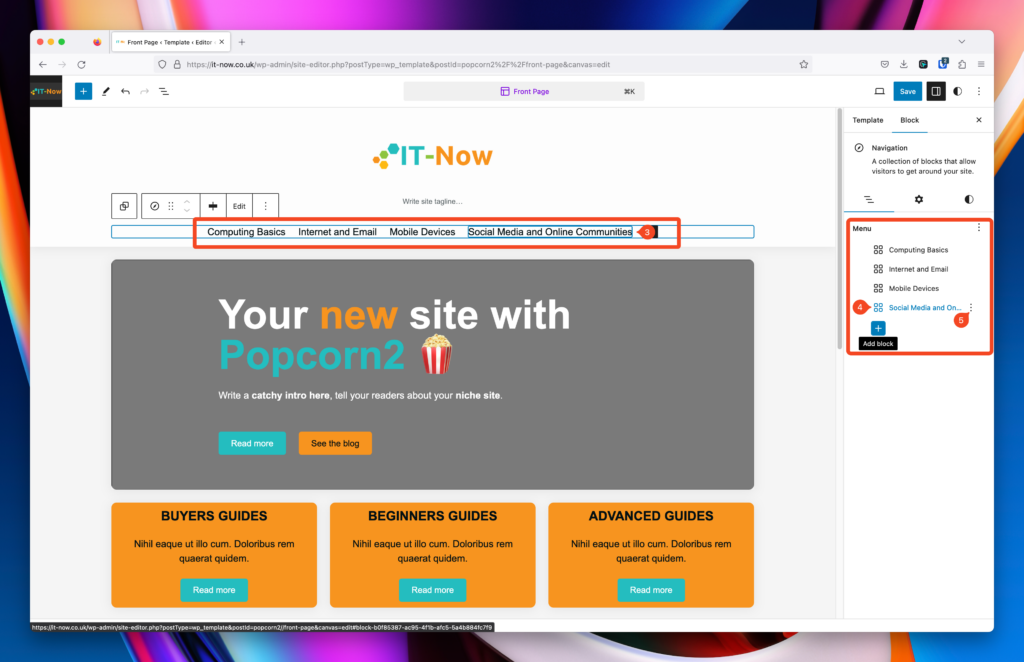
Add a Category
Search ‘Category’ (1) when adding an item. Then click Category Link (2).
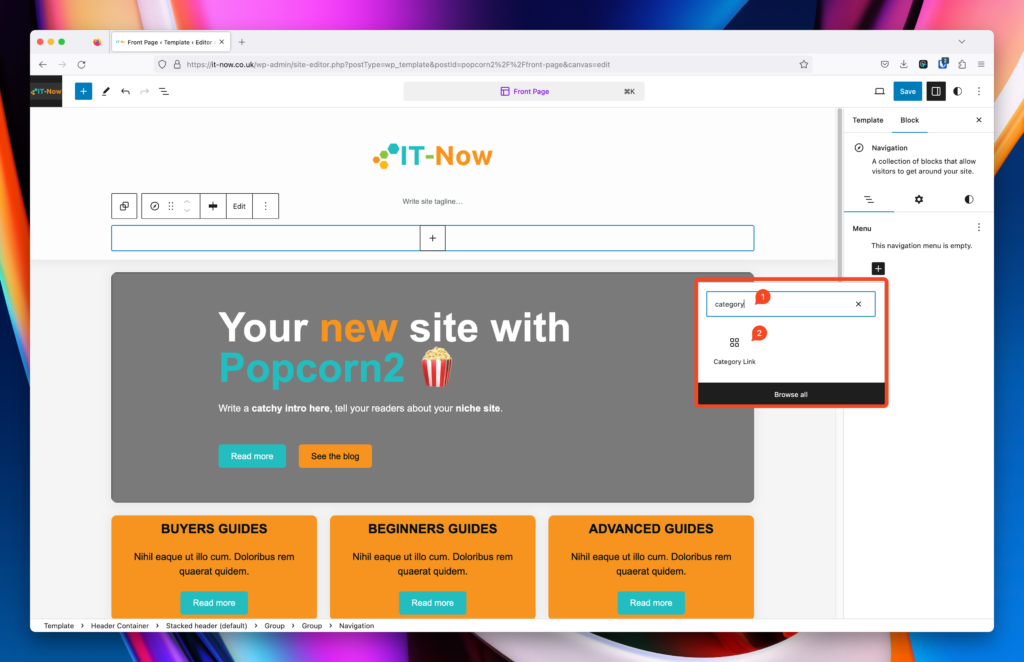
You’ll see a list of most recent categories, or search for another one.

Once you have added all your categories that you want in the main navigation, you can edit the text for them either in the editor (3) or in the tool bar for the navigation item (4). Clicking the Options (3 dots) (5) will allow you to Move the item up, down, add submenu or delete.
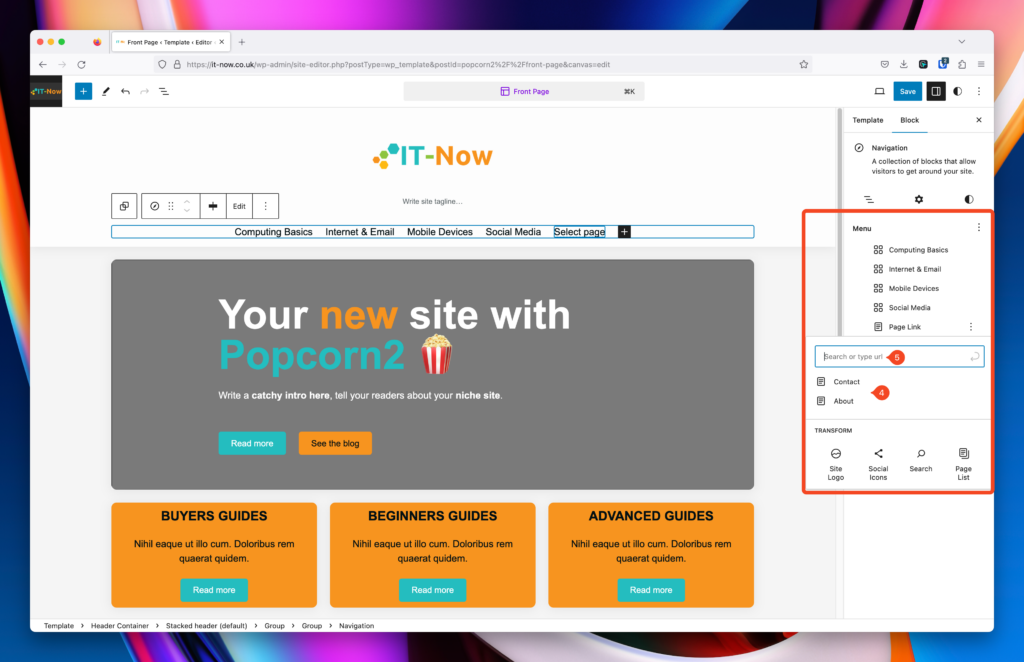
Add a Page
You can also add a page easily. Click the Plus + (1) and slect Page (2). Alternatively you can Search (3).
You can select a recently added page (4) or search (5) for a different page.
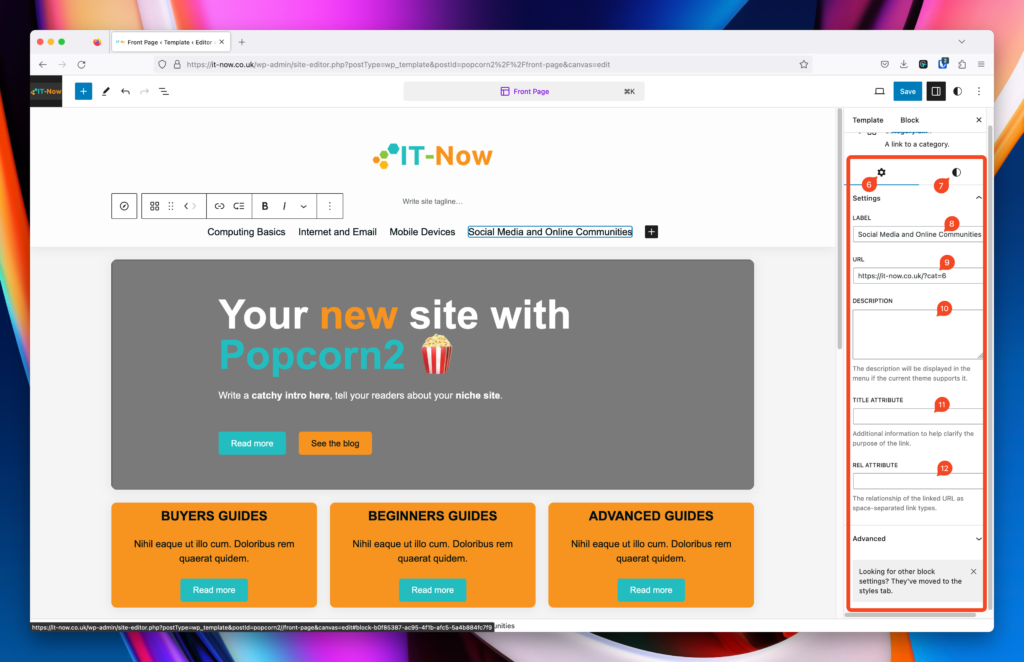
As with the Category, you can adjust the individual links:
- Settings
- Styles
- Label / Text
- URL
- Description of the link
- Title Attribute
- Rel Attribute

Other Menu Items
You can add other menu items easily using the same methods above for:
Be creative and experiment.
Remember to save your work!
Reverting or restoring template parts back
In block themes you can easily revert or clear any configurations back to defaults.
Open any template or template part that has been changed, and clear customizations (1).
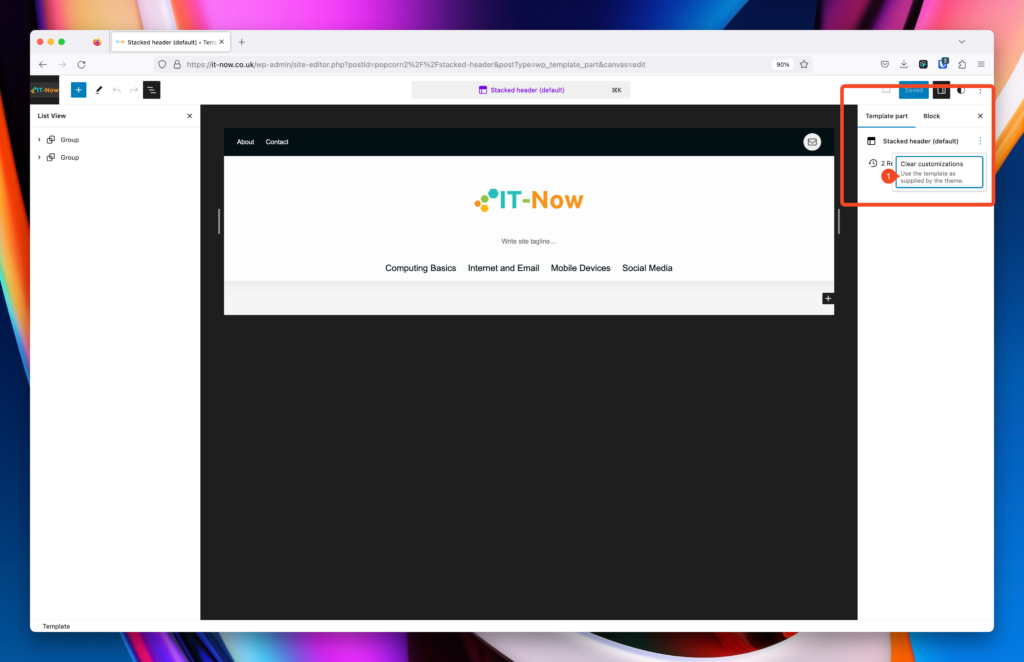
Alternatively you can clear customizations without opening the template in Manage All Templates.
You can also easily see where you have made changes (2).
Click Clear Customizations (3).
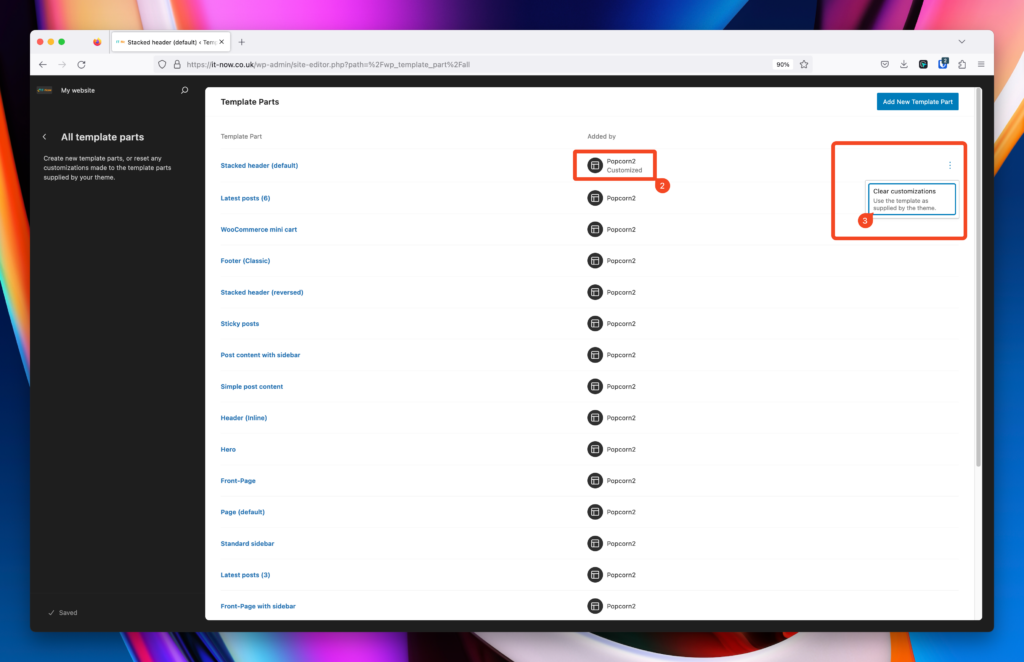
Restore from a different revision
You can also restore to a different revision (4) if you want to go back a couple of steps.

- Title Attribute: The
titleattribute in web design, specifically in HTML, provides additional information about an element when the mouse hovers over it. It is commonly used with navigation elements, such as links (<a>tags), to offer supplementary context or a description of where the link leads. When a user hovers their cursor over an element with atitleattribute, a small tooltip will typically appear, displaying the text that’s been assigned to that attribute. ↩︎ - Rel Attribute: The
relattribute in HTML specifies the relationship between the current document and the linked document or resource. It is most commonly used with the<a>(anchor) and<link>elements. Therelattribute helps browsers and search engines understand the purpose or nature of the link, which can influence behavior and interpretation. ↩︎
Leave a Reply