
Important: If you are unable to upload your logo it’s because you are properly running LiteSpeed Cache. Disable it whilst working on your website.
Table of contents
By default, your site will not have a logo. You will need to create one, we suggest using a PNG file as this allows the use of transparent backgrounds.
RESOURCES
Adding your logo is a quick process, follow the steps below to get the logo added to your new website.
Launch the Site Editor
You can load the Site Editor from the Front End of your Site or from your WordPress Dashboard, we will cover both here.
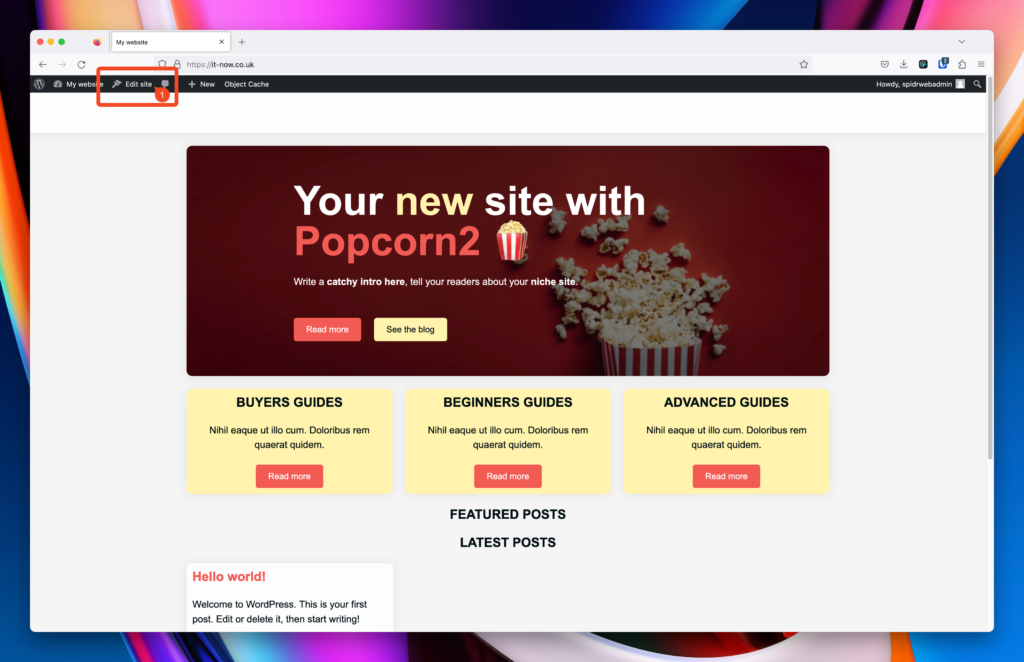
Launch Site Editor from the Front End
From the front end of your site you should see the WordPress Admin Bar. Click Edit Site (1).
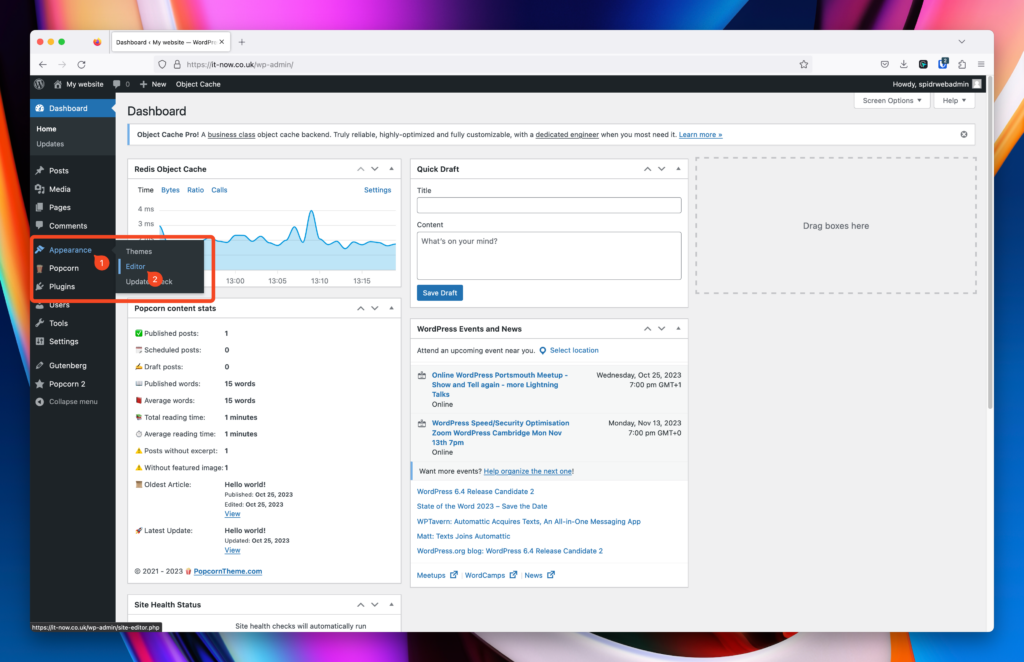
Launch Site Editor from the WordPress Dashboard
From the WordPress dashboard of your site click Appearance (1) > Editor (2).
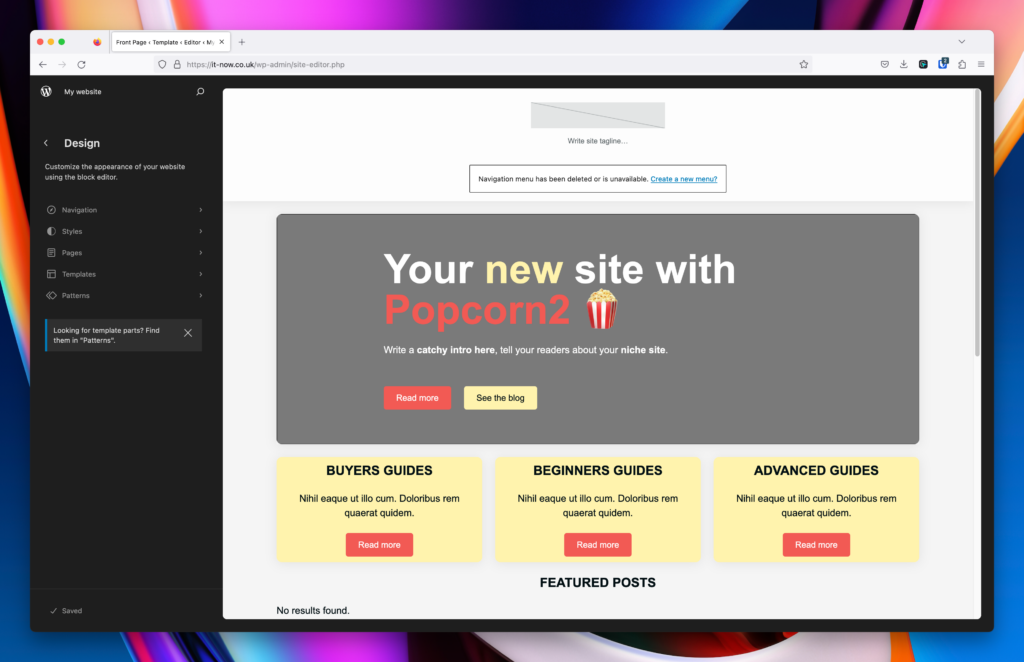
The Site Editor should now be open and look like this:
Adding your logo
Now that you should have a logo for your site, you can now upload and configure it.
Click on Patterns (1). This will load your patterns directory.
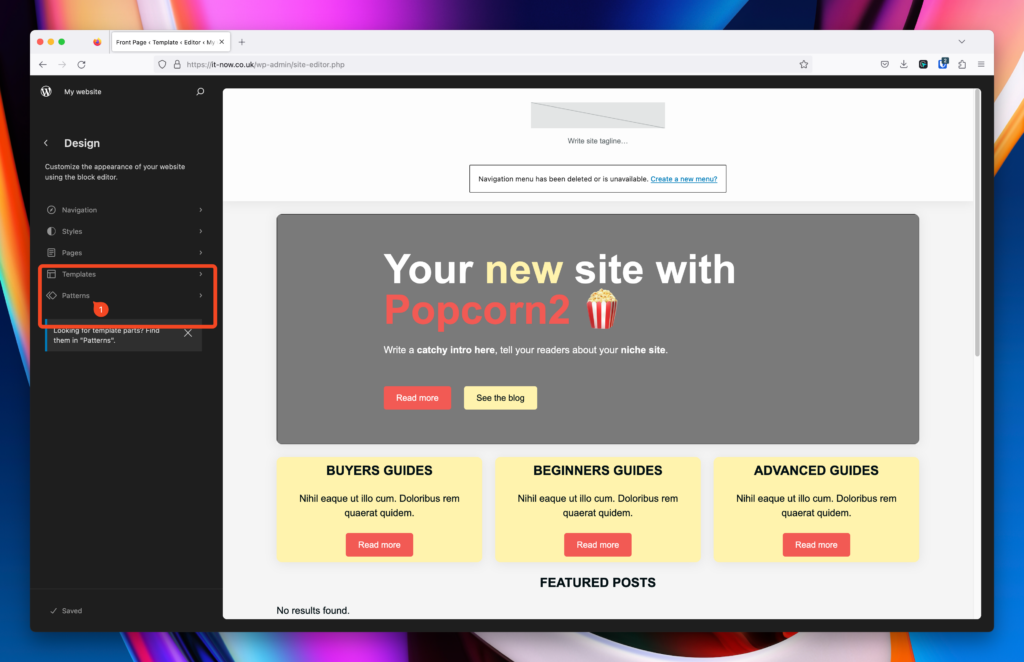
Click on Header (2) to load all the header patterns.
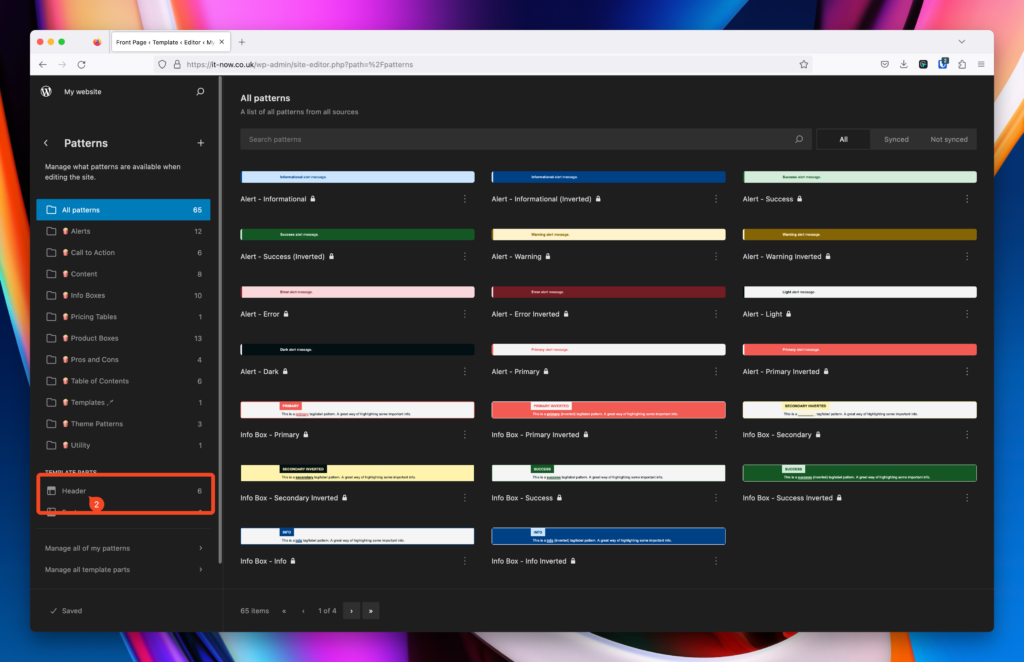
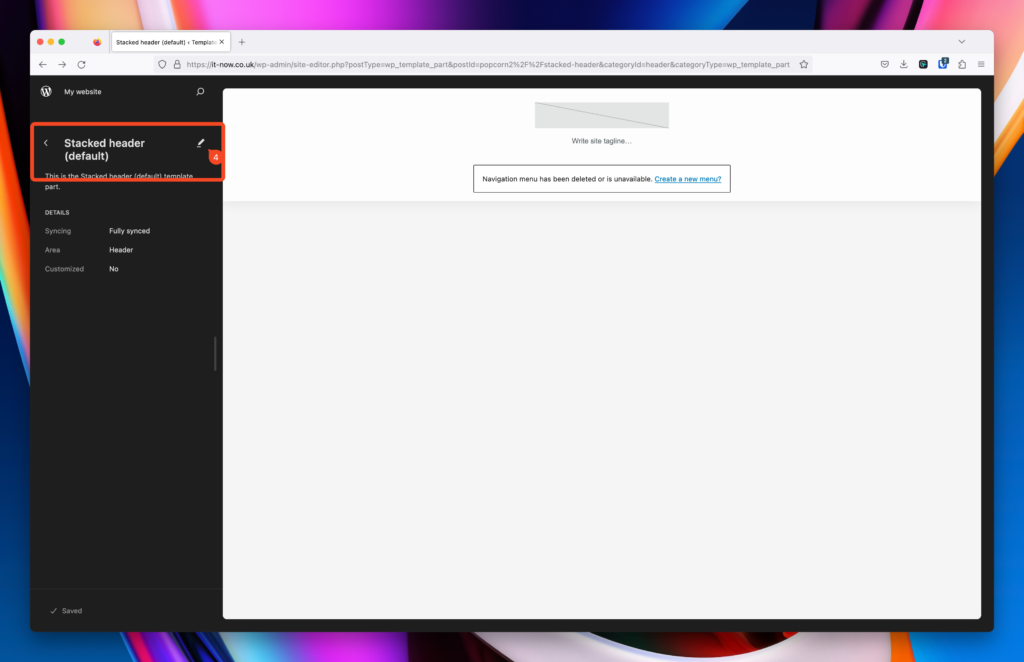
Select the header (3) that you are currently using (default is Stacked Header)
Click the Pen 🖊️ icon (4) to edit this template.
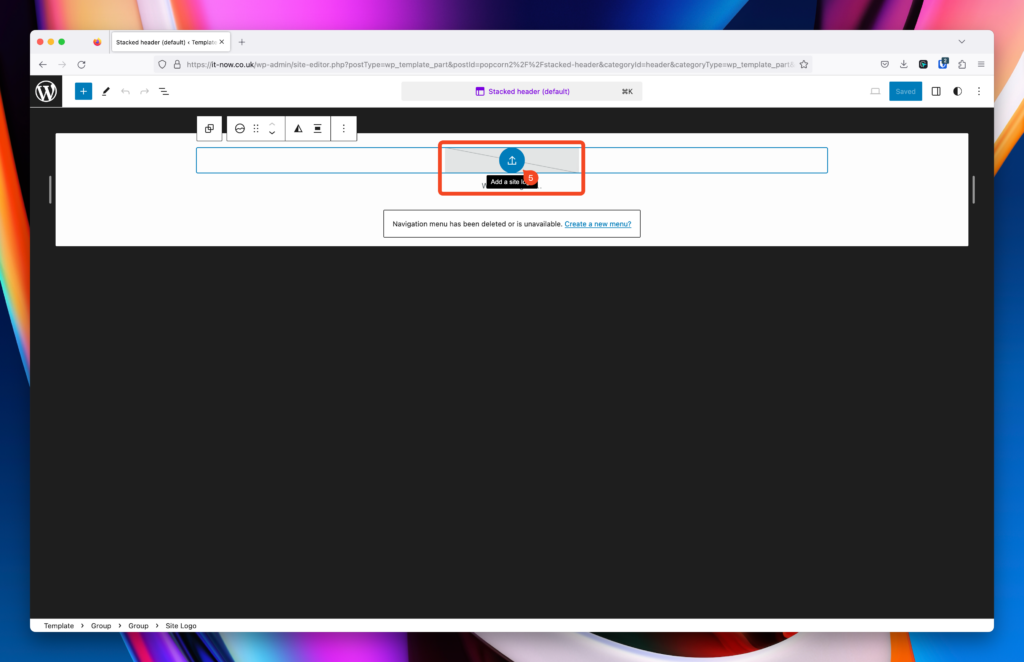
You’ll see a grery colored placeholder, this is the Site Logo Block where you can upload your logo. Click to Add a Site Logo (5).
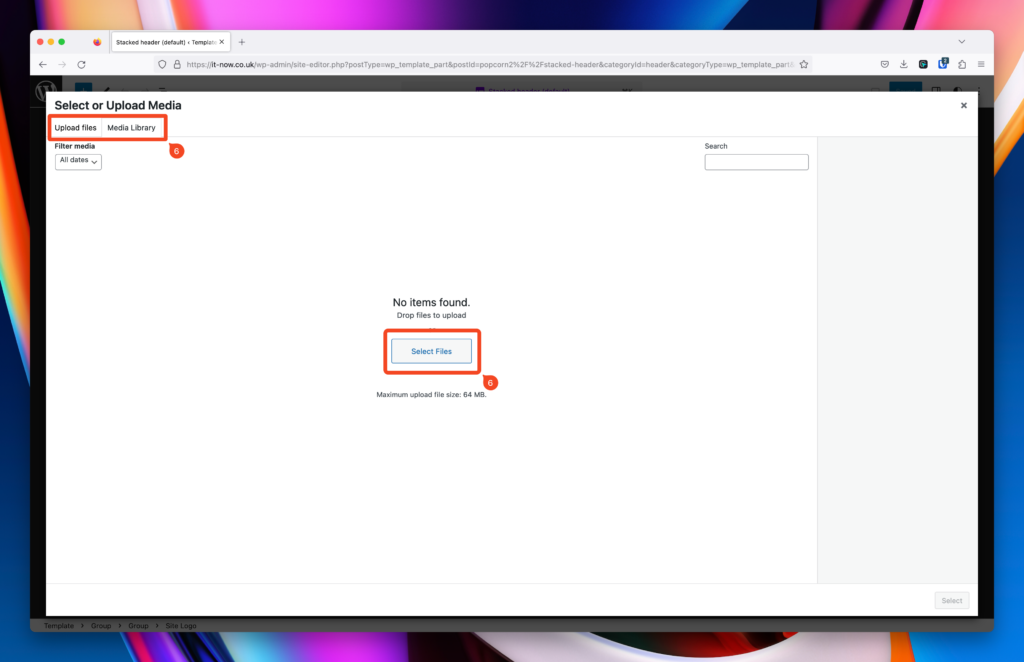
Select your logo from either from your Media Library or upload your logo (6).
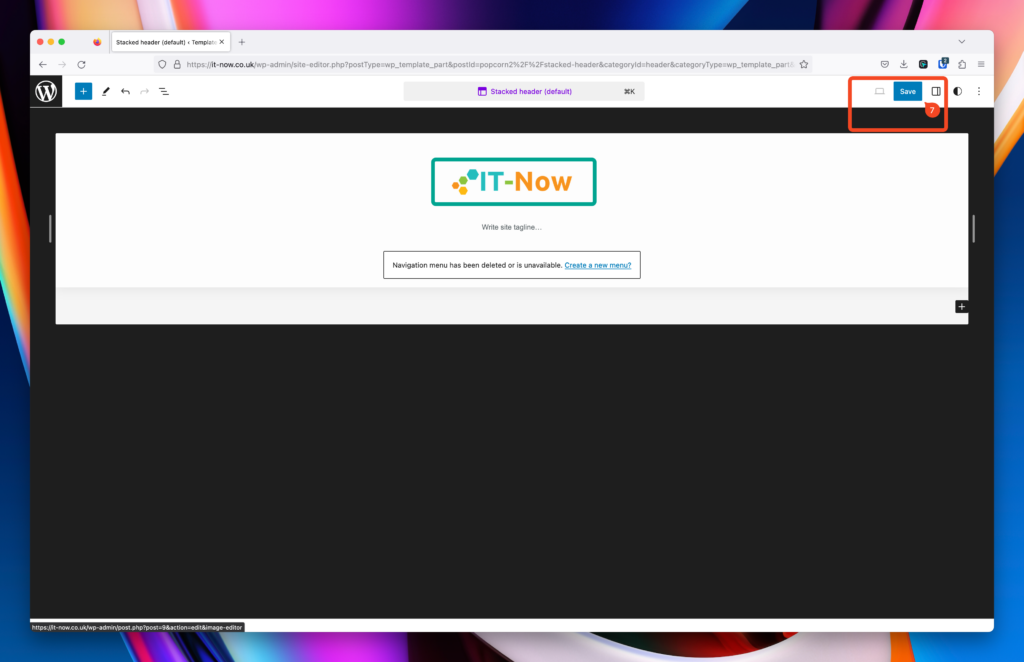
Your logo should now be uploaded and you should see this reflected in the Site Editor. Click Save (7) and confirm the changes.
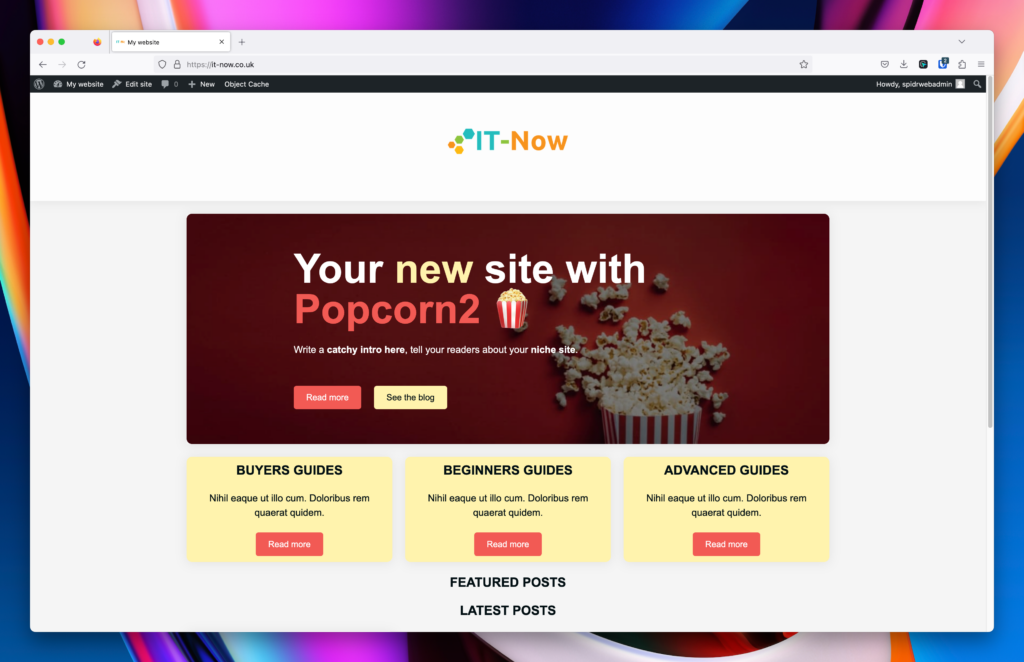
If you go to the front end of your site, you’ll notice that the logo has been successfully added.
Troubleshooting
In some circumstances, you may find that you cannot upload a logo. This is usually due to a caching plugin on your site. Disable any caching first if you encounter any issues. If you still get stuck, feel free to log a ticket under My Account on PopcornTheme.com.
Reverting or restoring template parts back
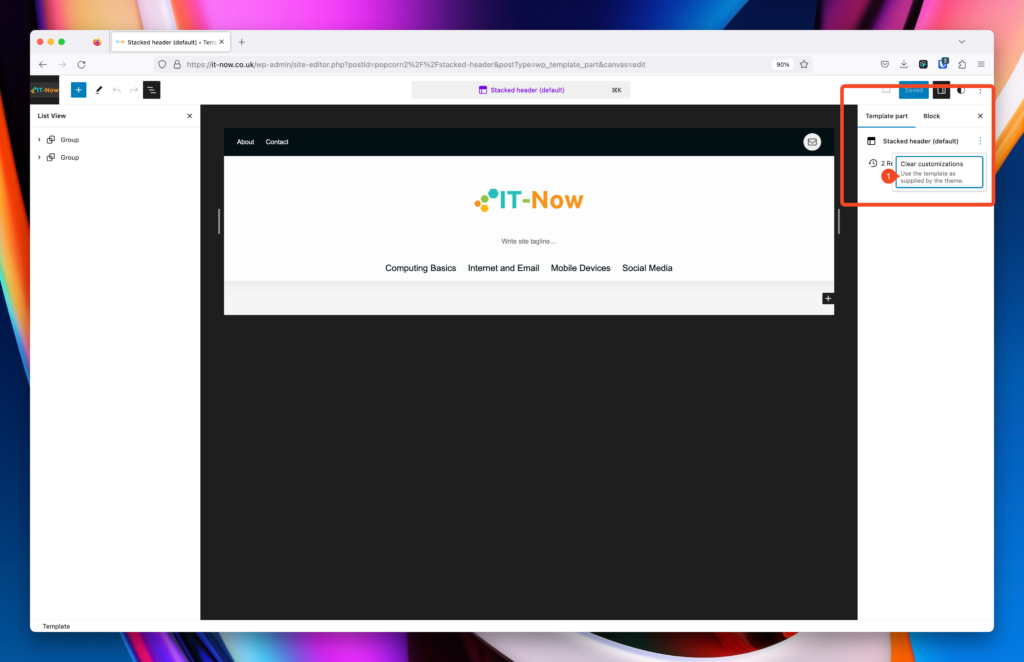
In block themes you can easily revert or clear any configurations back to defaults.
Open any template or template part that has been changed, and clear customizations (1).
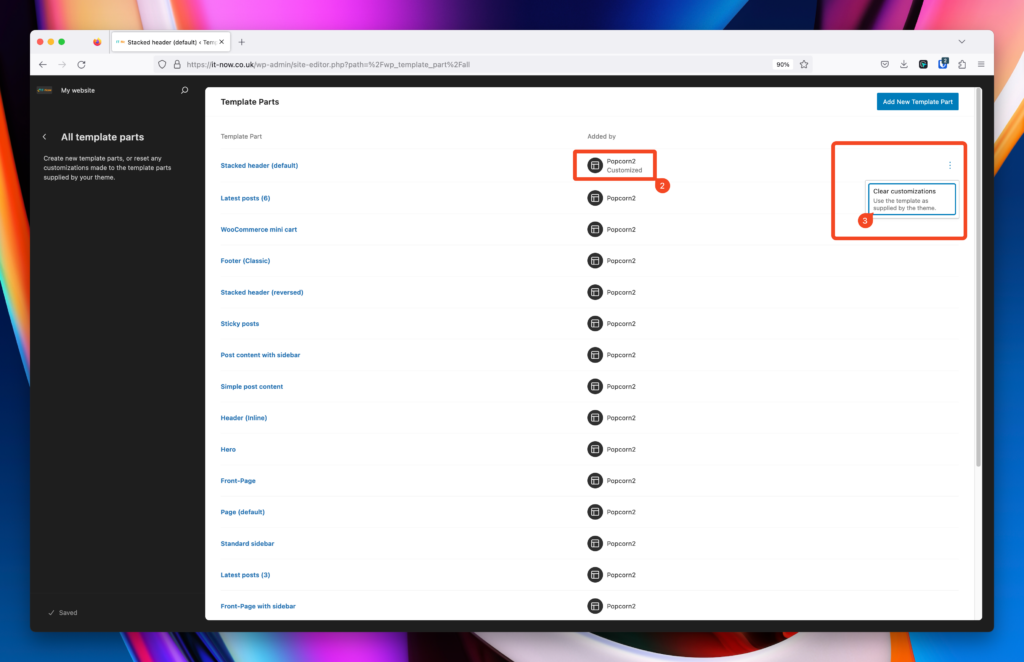
Alternatively you can clear customizations without opening the template in Manage All Templates.
You can also easily see where you have made changes (2).
Click Clear Customizations (3).
Restore from a different revision
You can also restore to a different revision (4) if you want to go back a couple of steps.

Thats it – you have uploaded your logo! 🎉
Maybe now set up your site tagline…
Leave a Reply