List view is probably going to be one of your most used areas of the site editor. Once you start to learn this, you’ll wonder how you ever coped without it.
The list view is the tree of blocks that are used on your site. It makes editing your affiliate site much easier.
We recommend enabling List view to open by default when you’re using site editor.
Site Editor – List View
Launch the Site Editor
You can load the Site Editor from the Front End of your Site or from your WordPress Dashboard, we will cover both here.
Launch Site Editor from the Front End
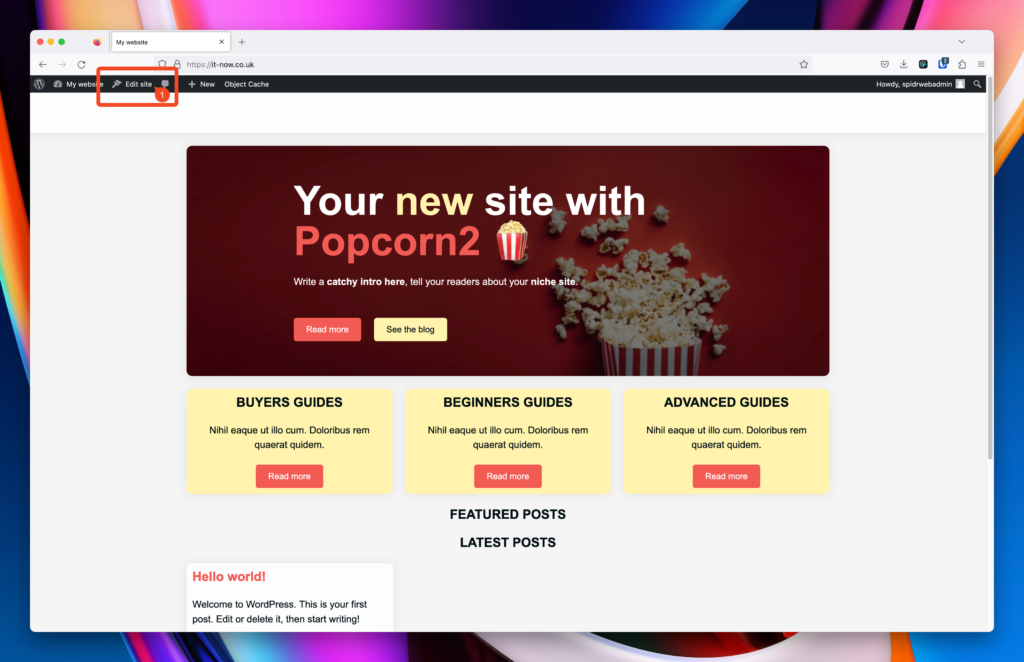
From the front end of your site you should see the WordPress Admin Bar. Click Edit Site (1).
Launch Site Editor from the WordPress Dashboard
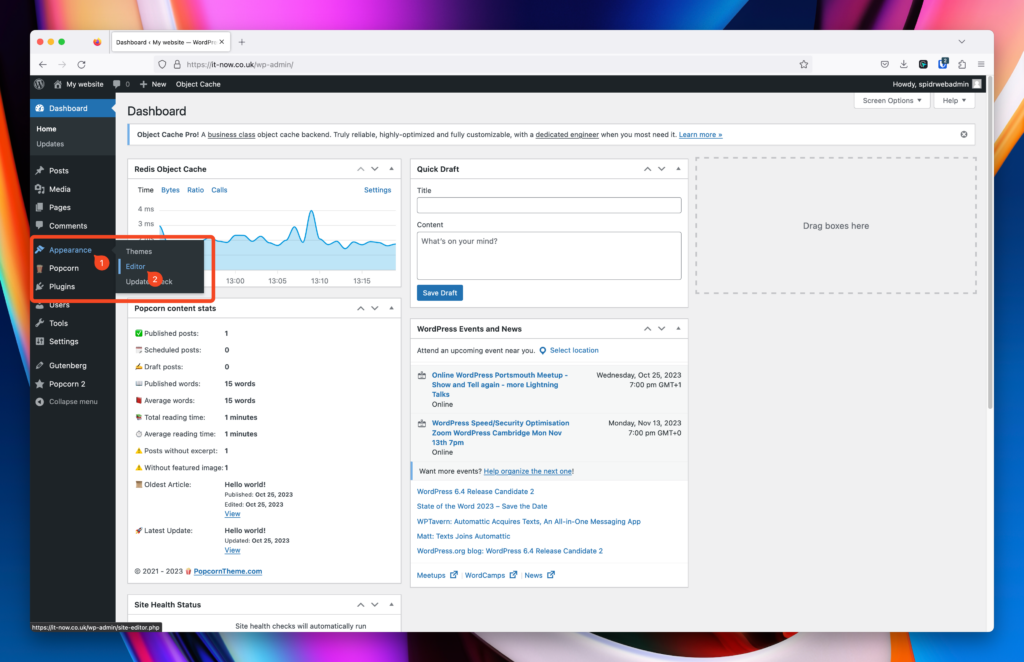
From the WordPress dashboard of your site click Appearance (1) > Editor (2).
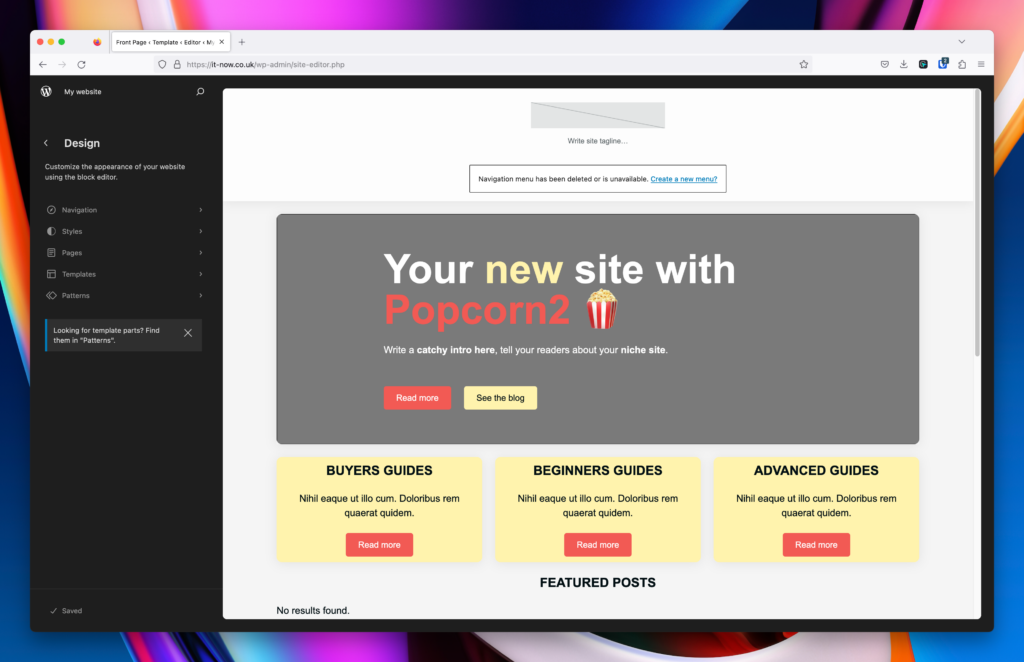
The Site Editor should now be open and look like this:
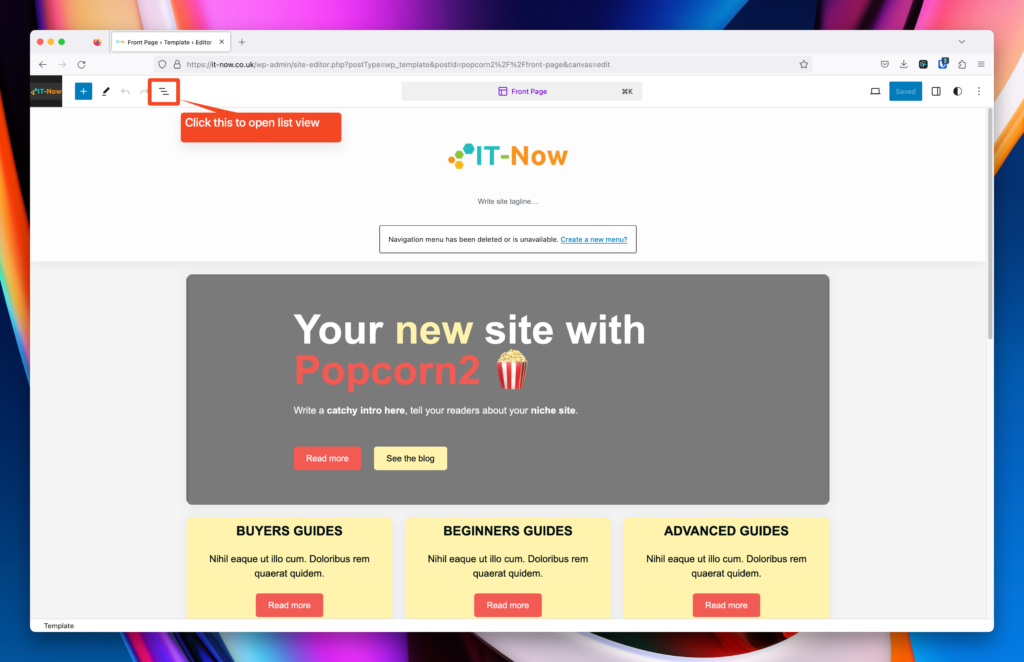
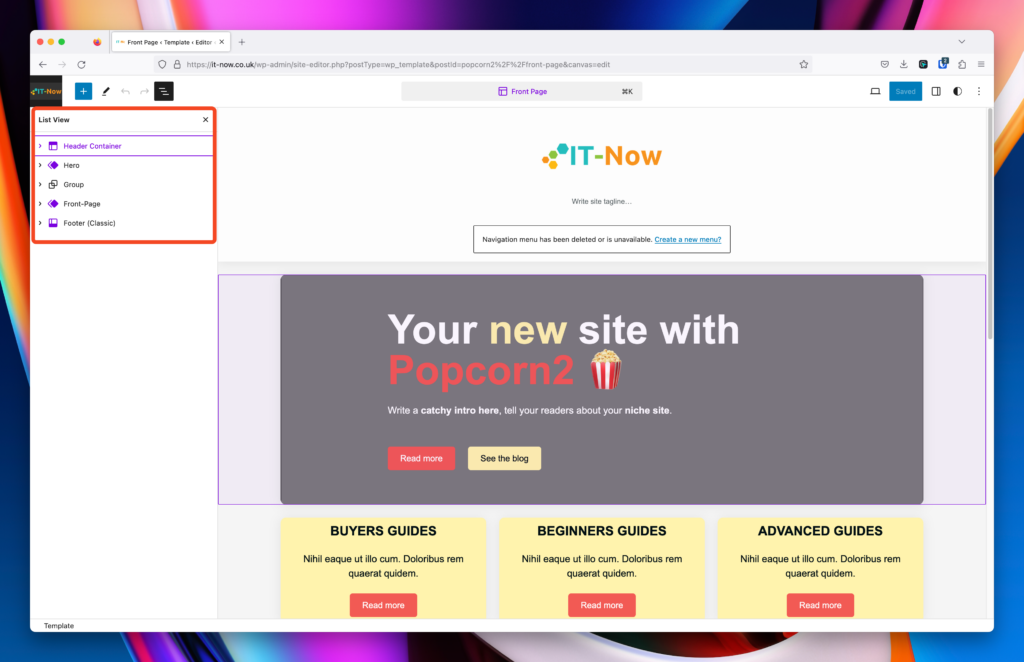
Open any template, and click the List View Icon This will show the tree / list of blocks used in this template.
List view will open and should look something like this:
Set List View to Open by Default for Site Editor
We suggest enabling this if you have enough screen space on the device that you’re using.
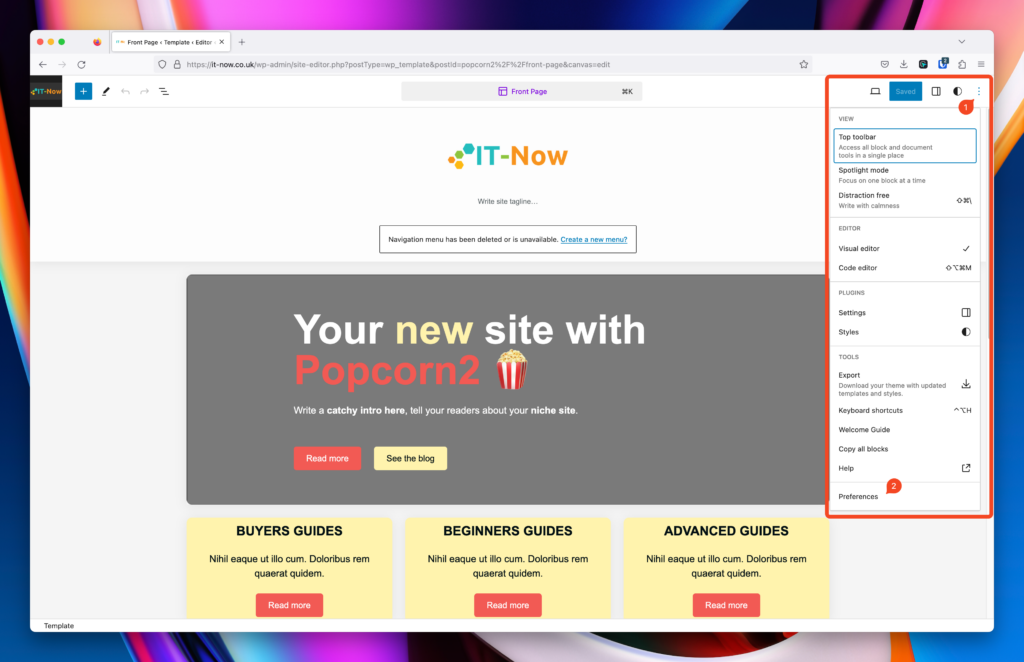
Open the Options (1) Panel and then click Preferences (2).
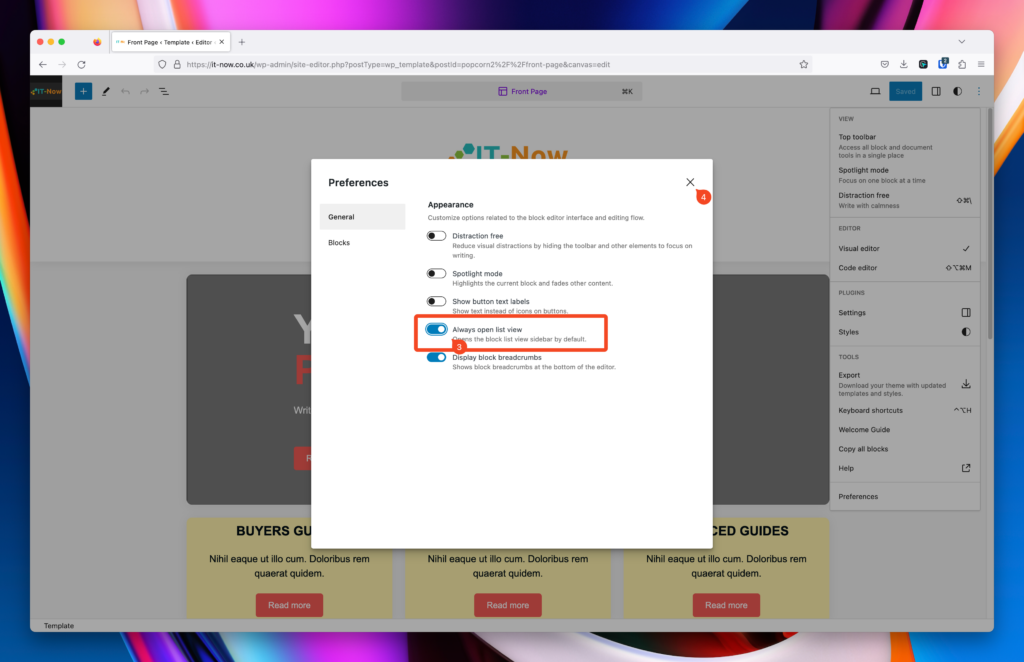
Enable Always open list (3) view and then click close (4).
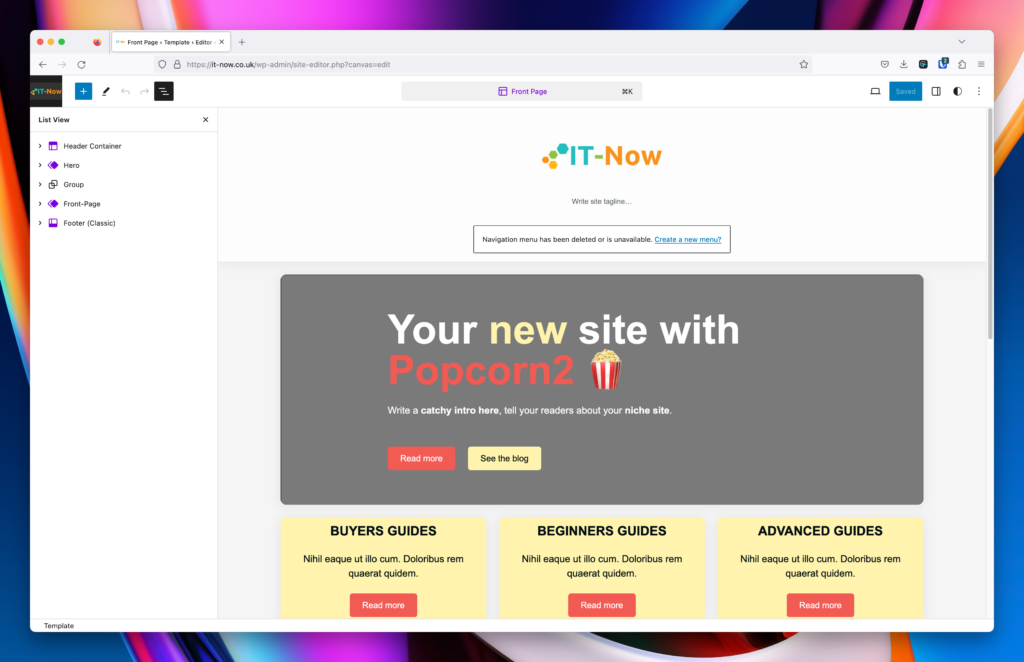
Next time you launch Site Editor, List view will always be open.
List View for Post, Pages and Cutom Post Types
You can do the same for Posts, Pages and Custom Post Types for List view. The steps are very similar – follow them below:
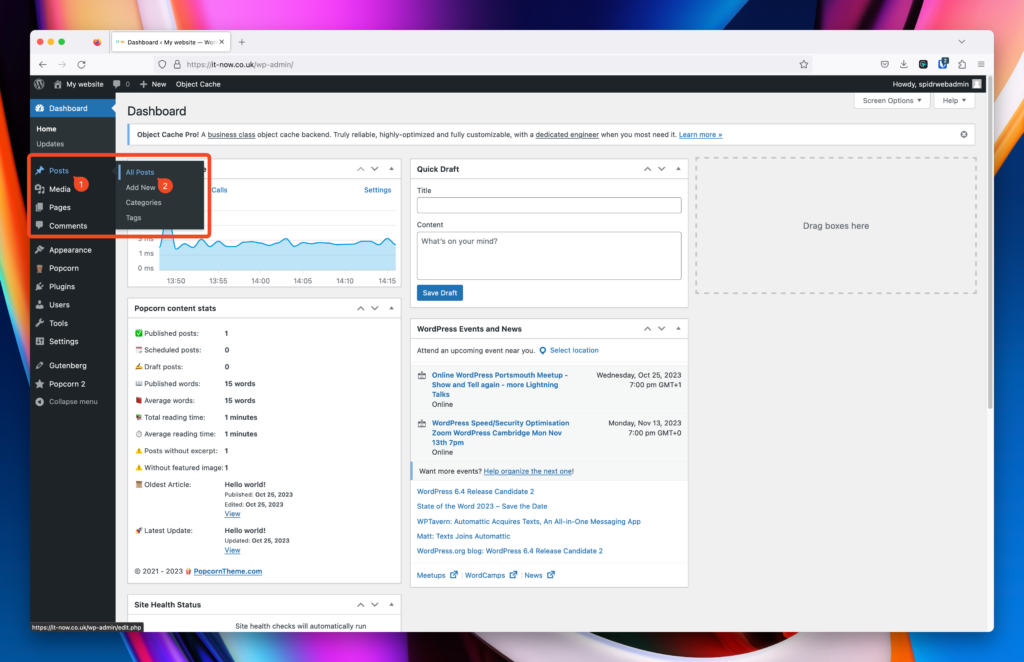
In your WordPress Dashboard, go to Posts (1) > All Posts (2).
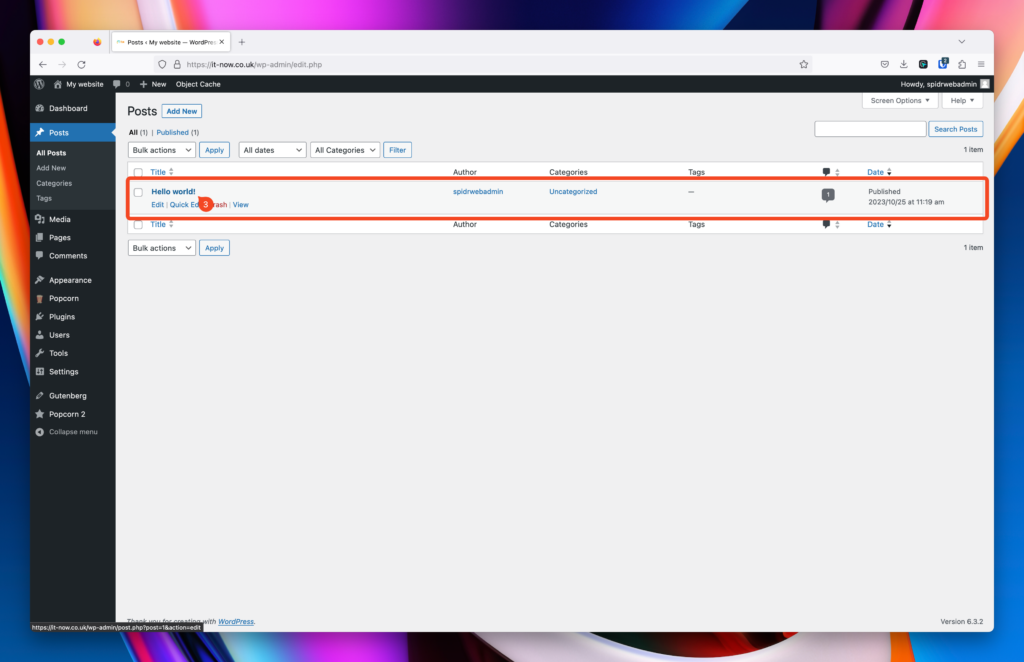
Edit any post (3)
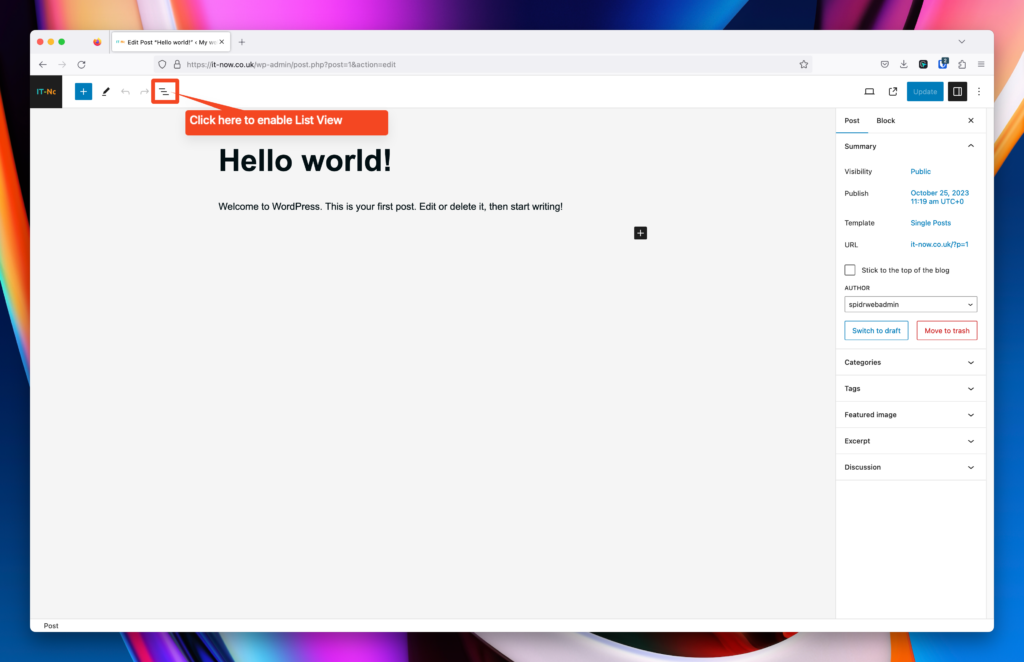
Clist on the List View Icon
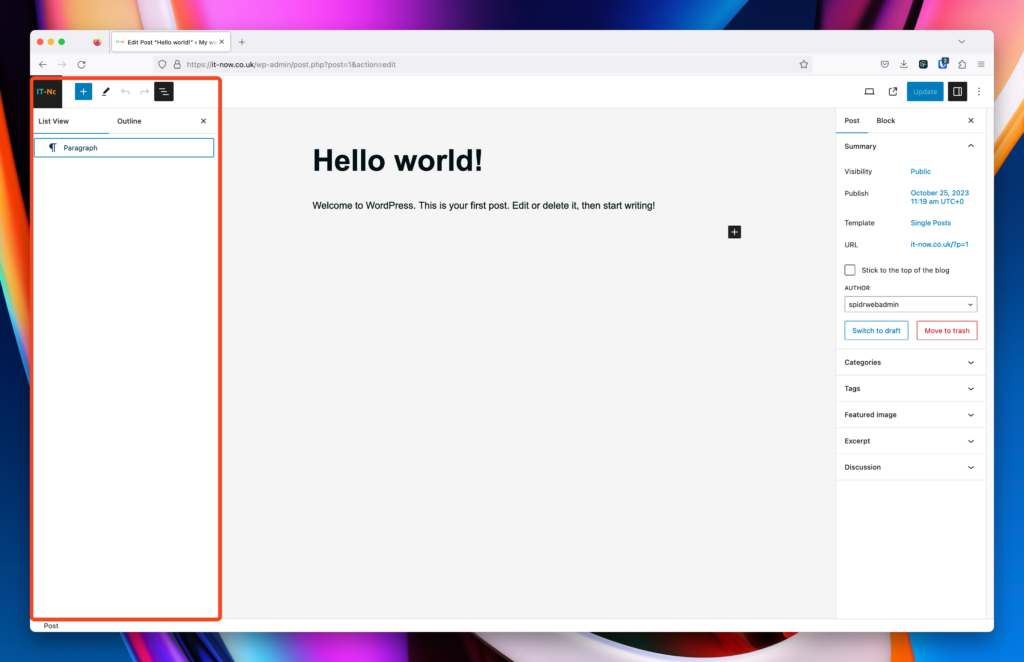
List view is now enabled. 🎉
Make List View Open by default for Posts, Pages and Custom Post Types
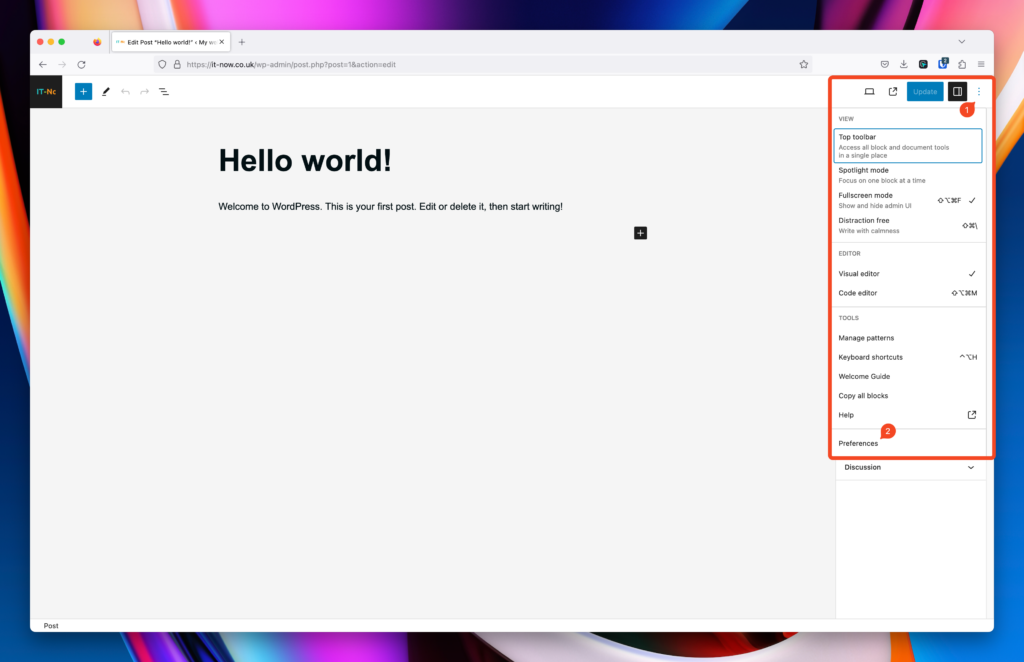
When editing a post, page or custom post type, click Options (1) > Preferences (2)
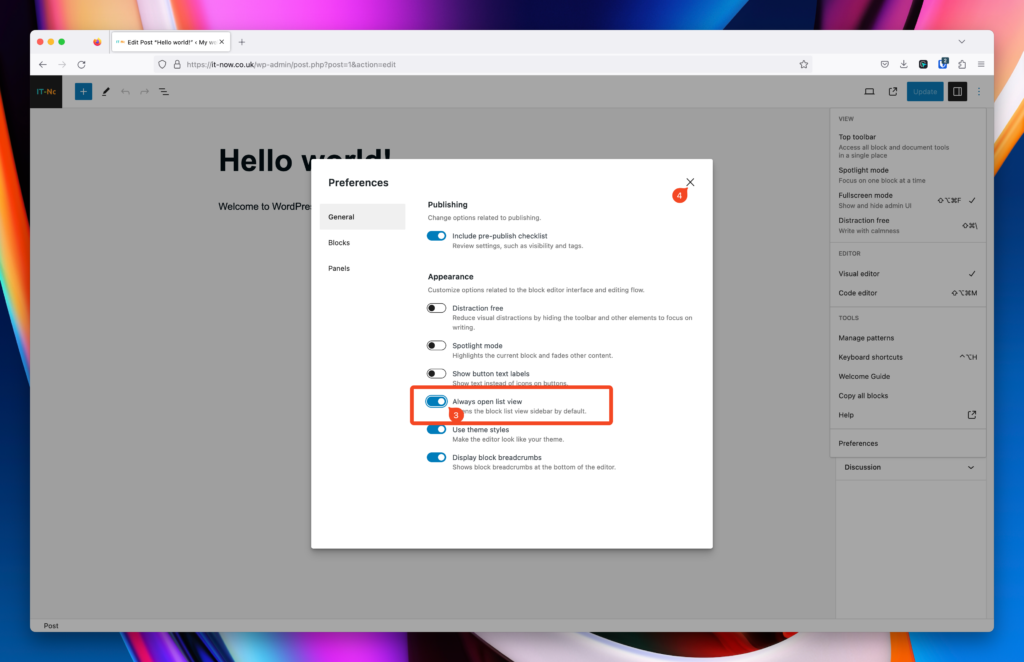
Enable Always open list view and then close.
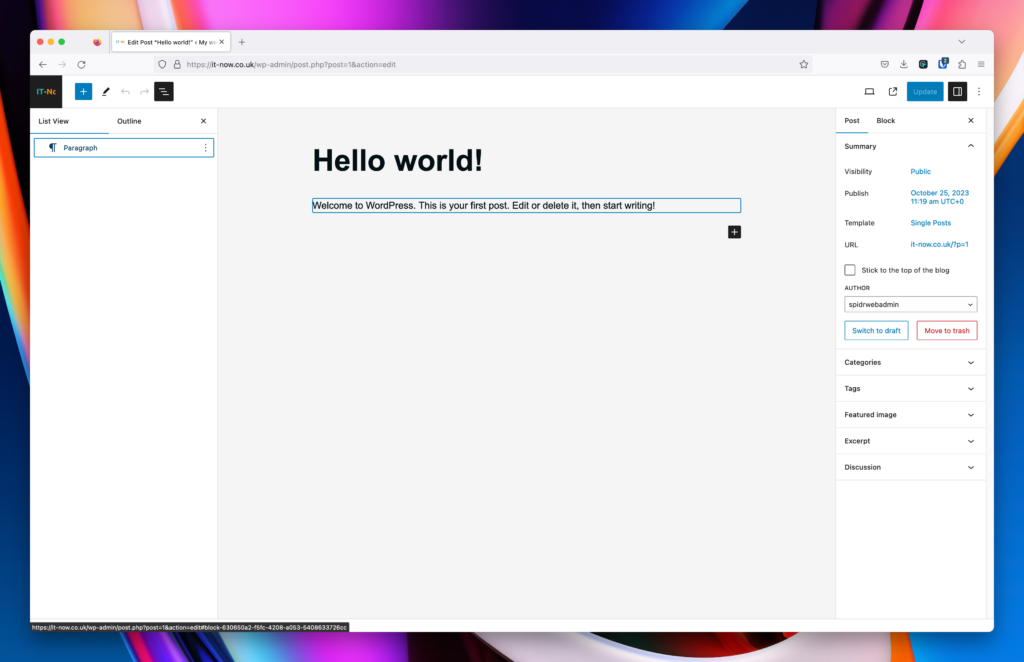
List view will always be open for your Posts, Pages and Custom Post types.


Leave a Reply